Ditch the Drip! Your DIY Guide to Fixing a Leaky Tap
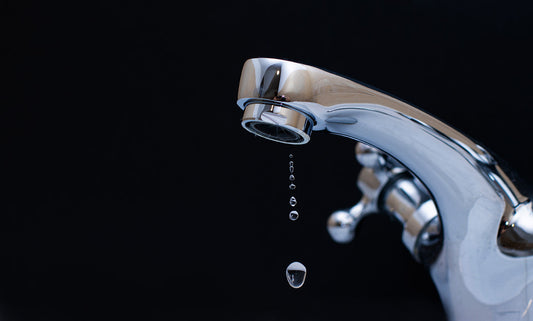
Drip... drip... drip... That sound isn't just annoying; it's the sound of water (and money!) going down the drain. A dripping tap can waste litres of water every single day, bumping up your water bill and harming the environment. But before you call out an expensive plumber, did you know that fixing a dripping tap is often a straightforward DIY job you can tackle yourself?
Here at Plumbers Choice, we believe in empowering homeowners. With the right parts and a little guidance, you can silence that drip for good. Let's get started!
Why Bother Fixing a Small Drip?
- Save Water: Even a slow drip wastes a surprising amount of water over time.
- Save Money: Lower your water bill and avoid plumber call-out fees.
- Prevent Damage: Persistent drips can stain sinks and countertops, and if left unchecked, could indicate a worsening issue.
- Peace and Quiet: Restore tranquillity to your kitchen or bathroom!
Before You Begin: Safety First!
- Turn Off the Water: This is crucial! Locate the isolation valve under the sink for that specific tap (usually a small lever or screw head you turn 90 degrees) or shut off your home's main water supply via the stopcock (often found under the kitchen sink or where the water pipe enters your house). Turn the tap on to drain any remaining water.
- Plug the Sink: Put the plug in! This stops small screws or parts from disappearing down the drain.
-
Gather Your Tools: You'll likely need:
- Adjustable spanner(s)
- Appropriate screwdrivers (flathead and Phillips)
- A cloth or rag (for grip and cleaning)
- Penetrating oil (optional, for stubborn parts)
- Replacement parts: This is key! You'll need either a new washer or a new ceramic disc cartridge, depending on your tap type. (More on this below!)
Step 1: Identify Your Tap Type
The fix depends on the type of tap mechanism:
- Traditional Compression Valve (Washer Tap): These usually require several full turns to go from off to fully on. The drip is typically caused by a worn-out rubber or nylon washer inside.
- Ceramic Disc Valve: These usually only need a quarter or half turn to go from off to fully on. They contain two ceramic discs. If dripping, the entire cartridge usually needs replacing.
Step 2: Fixing the Drip
A) For Compression Valve / Washer Taps:
- Remove the Cap: Carefully pry off the decorative cap on top of the tap handle (often marked H or C). A small flathead screwdriver might be needed.
- Unscrew the Handle: You'll see a screw holding the handle onto the valve stem. Unscrew this and lift the handle off.
- Expose the Valve: You might need to unscrew a metal shroud or cover to get to the main valve mechanism (sometimes called the headgear).
- Unscrew the Valve Mechanism: Use your adjustable spanner to grip the hexagonal nut on the valve mechanism and unscrew it (turn anti-clockwise). Be steady and hold the tap body if needed to prevent it from twisting.
- Replace the Washer: Lift out the valve mechanism. At the bottom, you'll find the washer, usually held in place by a small screw or just pushed on. Remove the old washer (note its size and type!). Clean any debris from inside the tap body (the valve seat) and the mechanism itself. Fit the correct new washer.
- Reassemble: Carefully screw the valve mechanism back into the tap body (don't overtighten initially). Replace the shroud/cover, handle screw, handle, and cap.
- Test: Slowly turn the water supply back on. Check for leaks. Fully tighten the valve mechanism just enough to stop any leaks around it. Test the tap operation.
B) For Ceramic Disc Taps:
- Remove Handle/Lever: Similar to above, pry off the cap and undo the screw securing the handle or lever. Lift it off.
- Remove Shroud (if present): Unscrew or lift off any decorative cover hiding the cartridge.
- Expose the Cartridge: You'll see the top of the ceramic disc cartridge, usually held in place by a retaining nut or clip.
- Remove Retaining Nut/Clip: Use your spanner to carefully unscrew the large brass retaining nut holding the cartridge down.
- Lift Out the Cartridge: The ceramic cartridge should now lift straight out. Note its size, shape, and how it aligns (there are often small locating lugs on the base). You must get an identical replacement.
- Install New Cartridge: Clean the inside of the tap body. Place the new cartridge in, ensuring it sits correctly on the locating lugs.
- Reassemble: Replace the retaining nut (hand-tight then a gentle nip with the spanner is usually enough – don't crush the cartridge!). Replace the shroud, handle, screw, and cap.
- Test: Slowly turn the water supply back on and check for leaks around the cartridge and spout. Test the tap operation.
Finding the Right Parts
Getting the correct replacement washer or ceramic cartridge is vital!
- Washers: Come in various standard sizes (e.g., 1/2 inch, 3/4 inch) and materials. Try to match your old one. It's often worth buying a multipack assortment if you're unsure.
- Ceramic Cartridges: These vary significantly between tap brands and models. It's best to take the old cartridge out first to measure it or find any identifying codes.
That's where we come in! Browse our huge range of Washers and Ceramic Cartridges at plumberschoice.co.uk. Use the photos and dimensions provided, or if you're stuck, Don't hesitate to reach out to us– our team can help you identify the right part!
When to Call a Professional
While many drips are easy fixes, call a qualified plumber if:
- You can't turn off the water supply.
- You can't undo the tap components, or something breaks.
- The tap continues to drip after replacing the washer/cartridge (the valve seat inside the tap body might be damaged).
- You're simply not comfortable tackling the job.
You've Got This!
Fixing a dripping tap is a satisfying DIY task that saves you money and conserves water. With the right replacement parts from Plumbers Choice and these simple steps, you can silence that drip and enjoy a smoothly functioning tap once more.
Ready to get started? Shop our extensive range of tap spares today!


